Survivalist Forum banner

Swaging a 22 bullet a pictorial (Graphic heavy)

57K views 65 replies 40 participants last post by  NorCalHermit  
#1 ·
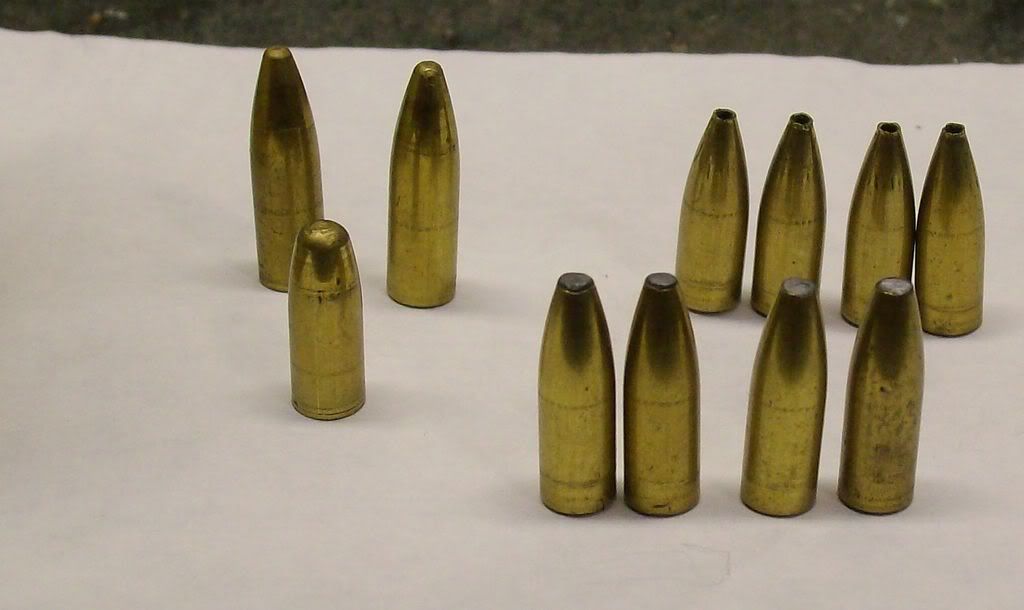
Ok I have heard a little chatter on this forum about homemade bullets and it seems that there is very little to no other information on the forum about it. We are going to change that. This is a pictorial of how to swage a 22 caliber bullet that can be shot in any 22 caliber rifle from bolts to autos with no ill effects so long as you follow a few simple guidelines.


Before we begin I want you to understand that this is not “THE WAY’ but “A WAY” of doing it. Other folks use different process but the results are the same.

Let’s begin.

You will need a “DERIMMING DIE” if you are going to use spent 22 rimfire hulls. You can get them on line just make sure it is for your press.

A “PRESS”, reloading presses are fine here so long as they are in good shape. You want it tight, not sloppy you are trying to hold minimal tolerances here. Try to stay away from cast aluminum if at possible, some hold up just fine others fail. I use a Corbin’s CSP-1 in the pictures because like you guys I thought that he was the only guy in town. I have since learned differently.

“LEAD”, or something else to make the cores with. You can use casted wheel weight or lead wire of proper diameter. Casted wheel weights will require a casting setup and a mold.

“BULLET FORMING DIES” A good set of dies are a must because they will determine the final outcome of your finished bullet, as well as the press.

Contrary to popular belief, you do not have to spend thousands on a setup. You can get going for a few hundred dollars if you catch things on sale. Otherwise, for a 22 caliber you are looking at $500 on the top end to get started. But this includes the press and all tooling. If you just want to do a pistol bullet like a 45 ACP, you can get started for under $200.

“LUBE” This is not a suggestion! A good quality high pressure lube that does not diesel is not an option. There are commercial brands you can buy or you can make your own from as little as 2 items. Don’t underestimate the homemade stuff. I found the recipe on line a few years back and it is all I use now. I even use it as a reloading lube and never have to worry about oil dents. Outstanding stuff!

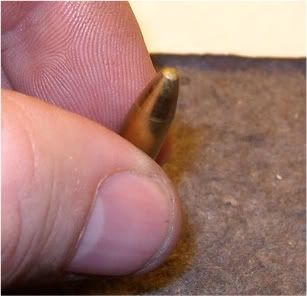
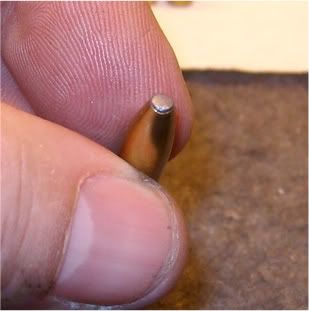
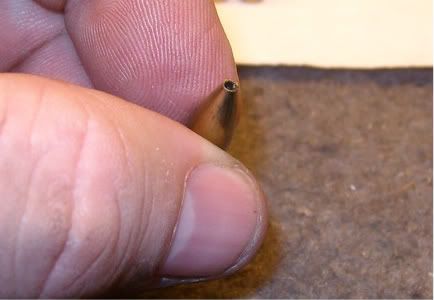
“JACKETS” only if you intent to do high power rifle loads, not really needed for pistols. They can be made or purchased, your choice.
 
#2 ·
In this case we are going to use rimfire hulls. The process doesn’t change if you use factory jackets from the big boys just and extra few steps added in. So this is where we are going to start.

Acquire as many hulls as possible. Expect a 1-5% rejection, failure rate; 10% if you are sloppy and try to cut corners. I separate mine by name brand and only use one brand at a time. Consistency equals accuracy.

The first thing that you are going to do here is clean them. You need to get the powder residue out of the inside and clean the external as well to keep from scratching your derimming die. You can boil them in hot water with dish detergent and vinegar for about 20 minutes, thoroughly rinse in cold water. You can use an Ultra Sonic Cleaner if you want. Wash them good. You want them to be clean. If you don’t get the priming compound out it may detonate on you in the press, even after cleaning it may still happen. Just be careful.

Image


Once they are clean to your satisfaction we go to step 2.

Set the press up. Again when I started Corbin was all I knew and that is what I bought. Here is the derimming set up for his press. Dr. Blackmon, Corbins and several others also make a set up for regular reloading presses.

Image


Now that the press is set up with the die set in place we are ready.
Image


After the hulls are clean and dry we begin. First take the lube that you are using and put a little dab of lube on the casing. I mean “LITTLE” if you are using a swage lube and place the hull on the post.
 
#3 ·
My lube is made from a 50/50 of anhydrous lanolin and Castor oil. This is 1.5 oz and will let me make 5-7000 bullets without any difficulty. I made 2 pounds when I mixed it all together.

Image


Once the hull is lubed place it on the post.
Image


Now, just raise the ram as usual and the let the magic begin.

Image


After a couple of them are done, they will begin to come out the top of the die.
Image


Inspect each one as they come out of the top, you are looking for cracks or splits in the casing. Sometimes one will slip by during your initial check and sometimes when the lip unfolds it will crack. Discard any that are crack or split.

Image


Re-clean the newly formed jackets and get ready for the next step. I generally do a few thousand at a time, just because I don’t want to do it but once and then every now and then.

From here you are off to anneal them. I put them on a pizza pan and place them in the oven, set for self clean and walk off. A buddy of mine uses his cordless drill and a blow torch, either way works, you need to get the material to the point that it glows red.


While they are cooling, set up for the next step.
 
#6 ·
From here on the process for using either rimfire jackets or factory jacket the process is the same.

Core swaging.

Since you know what weight of bullet you want you need to make the adjustments to get that weight. Most rimfire jackets are around 10 grains so for a 55 grain bullet we need a 45 grain core. Now you can cast your cores from wheel weight or you can use lead wire.

Core as casted
Image


Lead wire for 45 ACP bullet

Image


Once you have chosen either casted or wire, you will need to bring the core to its final weight. Start by casting, or cutting it about 3 grains heavier than needed. Lube and place in the core swage die to bring it to final weight. Note that you do not have to swage the cores to a desired weight but it helps in keeping things uniformed. You get dramatic weight differences otherwise.

The core brought to weight
Image
 
#9 ·
Ok from here on it in it gets fun.

Now it is time to install the core seat die in the press. The die you use will determine the base of the bullet: flat, boat tailed or rebated. Rebated is done in a 2 step process where the others are in a single step.

Place your newly formed cores into the jackets.

Image


And simply raise the ram to seat it in place.

Image


Now for all intent and purpose, you have just made your very own full wad cutter .22 bullet. Congrats. It isn't a full 224 diameter yet, it is more than likely at .222 at this stage.
 
#10 ·
Ok, our cores are seated.

Here is the last batch of I did with rebated boat tailed bases.

Image


I made a minimum of 1000 at a crack, but that is just me. I make a lot in one sitting so that that all have the same adjustments.

From here the last step is point forming. The type of bullet should have been decided at the very beginning of the process, since it will dictate the process. In this case we are going to make an open tip, as opposed to a hollow point.

We remove the core seat die and install the point forming die.
Lube the bullet as we did on every step of the process and pull the handle. Here is where I go real slow. I can control the amount of the meplat (tip of the bullet) to any diameter I want as long as it falls in the rules. Once I get to the size that I am after, it is locked down and off I go.

You can make different bullets with the same die set, within reason. Weight is decided by the jacket length, hollow point, open tip soft point or lead tipped, you pick.


This one was made during the learning process, they no longer have a flared tip or a crease in the rebate.
Image


Here are some other types of bullets that I made with this die set.
Image


Close ups
Image

Image

Image


The sky is the limit. And in case you were wondering how they shoot, 1 MOA or better. I average ½ MOA out of my bolt gun with these little babies, 1 MOA from the AR. Others have literally shot one hole groups.

A beginning work up group with the bullets that you just read about being made.

Image
 
#11 ·
Now pistols are quite different. They can be made in a single die and on one stroke. I made quite a few 45 ACP’s from .40 caliber brass that had split necks or were otherwise not reloadable.

You can use a 2 die set as well for more control off the finished product, but a one die set and a good reloading press can get you this.

Image


And they are capable of shooting this.

Image
 
#22 ·
So as I am understanding it, you are using the rimfire casings to create a brass-jacketed (as opposed to a copper jacketed) bullet that could be used to reload .223 or .556? Or are they only for true .22 centerfire like .22 hornet?

IF it can be used for say, .556, I have a couple of questions.

1. Have you tried going with a heavier bullet, say 62 grain, or have you found an absolute upper limit using the .22 brass?

2. Have you experimented with inserting something like a steel BB or something in the lead, to give it more solid penetrating power?

3. I couldn't see in the pictures, but when you have your lead inserted into the brass, which end of the brass becomes the point? It seems that the base of the brass would be more easily formed and less likely to have defects create drag, but again, you're the master!

Excellent post by the way, this really should be stickied.
 
#23 ·
Been waiting for this to be asked. If the gun will shoot a 22 caliber it can shoot these, 5.56 included. I load them in my 22-250 and push them at 3800 fps and at 3200 out of my AR. My friend loads them in his Ruger M77 and drives with them. Field varmints never knoew what hit them.

The practical limit of the 22LR hull is 62 grains, anything more than that and it is lead tipped which doesn't feed well in my AR. However I have made a 107 grain bullet using a 22 mag shell casing. 22 shorts make wonderful bullets for 22 caliber air rifles and can be made as lite as 9 grains where a standards 22 caliber pellet is 21 grains.

I have tried putting BB's in but the problem that I had was not being able to center it. Remember these are spinning quite fast and if it is off center the grouping goes to hell in a hand basket. But there are things that be done to increase the penetration capability or the rapid expansion of the rounds.

Question 3 is dependent on the style that you are making. Anything but FMJ and the open part goes in the point form die first. The FMJ style, the core is seated in the point form die turned around and the open end is slightly closed, turned back around and finished off. This closes the base and makes a FMJ bullet.
 
#29 ·
One friend made .50BMG bullets with 1/2 inch copper tubing.

He would tin the inside with lead solder swag the bullets with a lead core then bake in a high temp oven to melt the lead onto the tinned copper.
bonded the core to the jacket good.

Other things he did was half fill and solder a copper rod that just fit the tubing and make a soft point bullet with a solid base. this made a hard partition bullet.

and if you have a lathe you can hollow point the copper base part.

Another interesting trick is to press in lead shot instead of a lead cylinder.
these bullets explode into hundreds of small pieces.
 
#32 ·
You can use pine rosin dust to "bond" things as well. Once heated it is pretty much there forever, cheaper too.


Ammosmith is making a pistol bullet out of thin wall tubing, shot shell pellets and caping it with an air-soft pellet, "Poor mans Glaser round". Waiting on the test results now but I fully believe that they will perform flawlessly. All of it is being made out from dies used on a standard reloading press.


I love the partition bullet ideal. I may have to give that one a go.